Overview
This section provides step-by-step instructions to deploy the OpsRamp Gateway VM using an ISO image on supported hypervisors.
The following hypervisor environments are supported:
- VMware vSphere / ESXi
- Microsoft Hyper-V
- Kernel-based Virtual Machine (KVM)
- HPE VM Essentials (VME)
Prerequisites
Before deploying the Gateway VM, ensure the following prerequisites are met:
- Gateway ISO image downloaded from the OpsRamp portal.
- Valid license and credentials for Gateway registration.
- Access to the hypervisor management console (vSphere Client, Hyper-V Manager, virt-manager, or VME).
- VM network connectivity to OpsRamp Cloud endpoints.
- Review the server requirements before creating the VM.
Installation Steps
Below are step-by-step instructions to deploy the OpsRamp Gateway in various environments:
Step 1: Connect to VMware ESXi Server
- Open vSphere Client and log in to your ESXi host.
Step 2: Upload the Gateway ISO to Datastore
Before creating the VM, upload the Gateway ISO to the VMware datastore:
- In the vSphere Client, navigate to Storage.
- Select your target datastore.
- Click Datastore Browser.
- Click Upload > Upload File.
- Browse and select the Gateway ISO file downloaded from the OpsRamp portal.
- Wait for the upload to complete successfully.
Info
Make a note of the directory path where the ISO is uploaded—you’ll need it in a later step when attaching the ISO to the VM.Step 3: Create the Virtual Machine
- Go to the VMs and Templates view.
- Click Create / Register VM.
- Choose Create a new virtual machine and click Next.
- Provide a unique name (e.g.,
OpsRamp-Gateway-VM01). - Select the VM compatibility version (default is fine for most setups).
- Choose Linux as the Guest OS family.
- Select Ubuntu Linux (64-bit) as the Guest OS version.
- Choose the datastore for VM storage.
Step 4: Configure Virtual Hardware
Click Customize Settings or Edit Settings before finalizing VM creation. Under the Hardware tab:
- CPU:
- Set to 4 vCPUs (or more if needed).
- Memory:
- Allocate 8 GB RAM minimum.
- Hard Disk:
- Set to 60 GB or higher.
- Use Thin Provisioning or Thick Provisioning as per policy.
- CD/DVD Drive:
- Select Datastore ISO File.
- Browse to the path where you uploaded the Gateway ISO.
- Enable Connect at Power On.
- Network Adapter:
- Connect to the appropriate port group or VLAN.
- Ensure Connect at Power On is checked.
Step 5: Set Boot Mode to BIOS (Recommended)
- Under the VM Options tab, set Firmware to BIOS.
- BIOS mode is recommended for better compatibility during ISO-based installation.
Step 6: Finalize the Deployment
- Review the VM settings.
- Click Finish to create the virtual machine.
- Power on the VM to begin the Gateway ISO installation.
In this section, you will find a detailed walkthrough for deploying the OpsRamp NextGen Gateway ISO using Hyper-V Manager on Windows.
Step 1: Launch Hyper-V Manager
- Press Windows + S and type Hyper-V Manager in the search bar.
- Select Hyper-V Manager from the results to open it.
- If prompted, enter your credentials to proceed.
Step 2: Create a New Virtual Machine
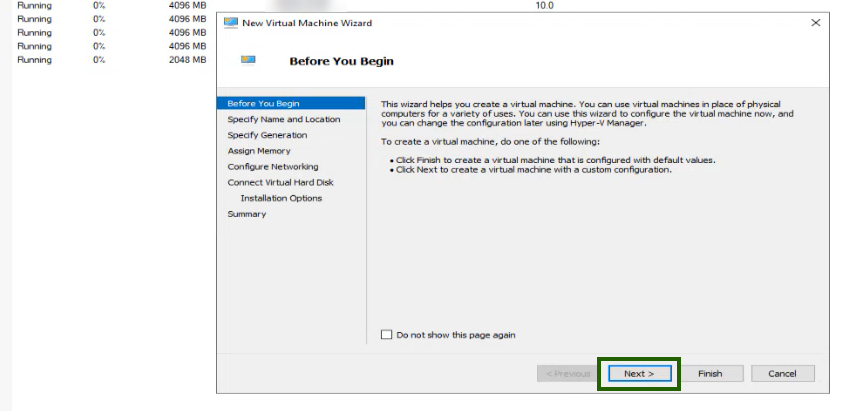
- In the Actions pane, select New > Virtual Machine.

- The New Virtual Machine Wizard opens. Click Next to continue.
Step 3: Configure the Virtual Machine
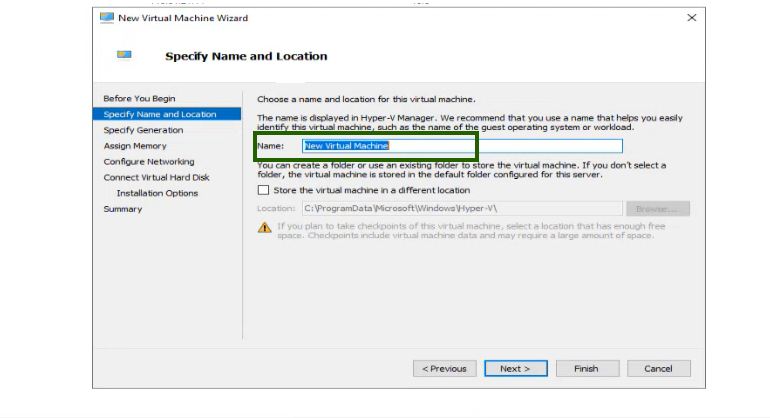
Name and Location
- Enter a VM name (for example:
OpsRampGatewayVM). - Select a location to store VM files.
- Enter a VM name (for example:
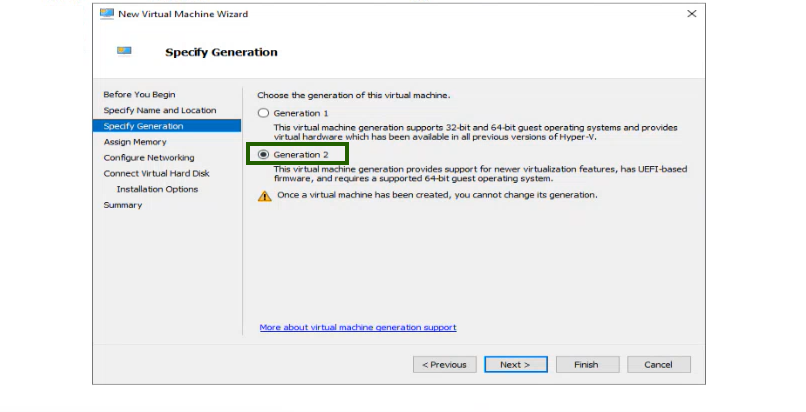
Specify Generation
- Choose Generation 2 (recommended for UEFI support).
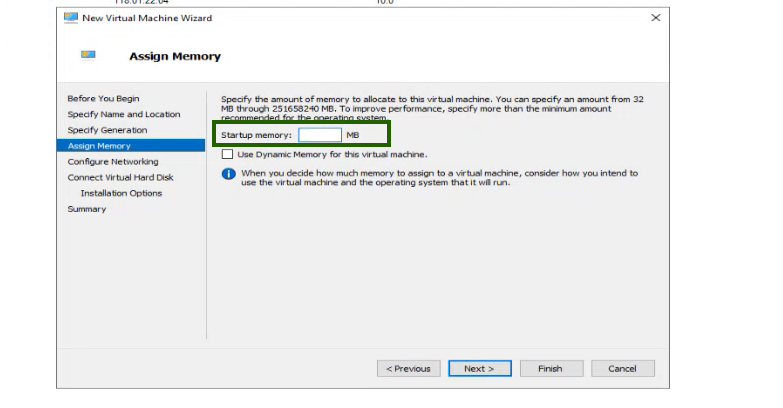
Memory
Allocate 8192 MB (8 GB RAM) minimum.
Networking
- Select a virtual switch.
- For internet access, choose an External Switch.
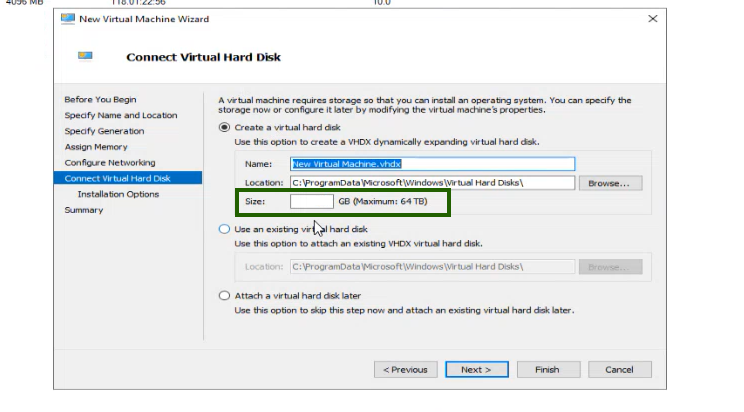
Virtual Hard Disk
- Select “Create a new virtual hard disk”.
- Set to 60 GB or higher.
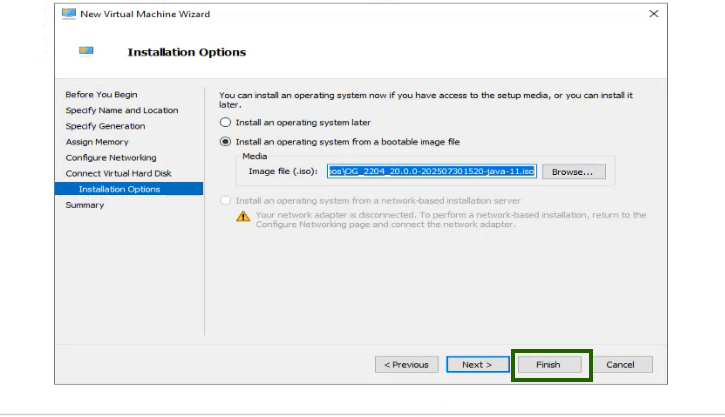
Installation Options
- Select “Install an operating system from a bootable image file”.
- Click Browse and select the ISO file downloaded from the OpsRamp portal.
- Click Next.

Step 4: Finish and Start the VM
Review the settings and click Finish to create the VM.
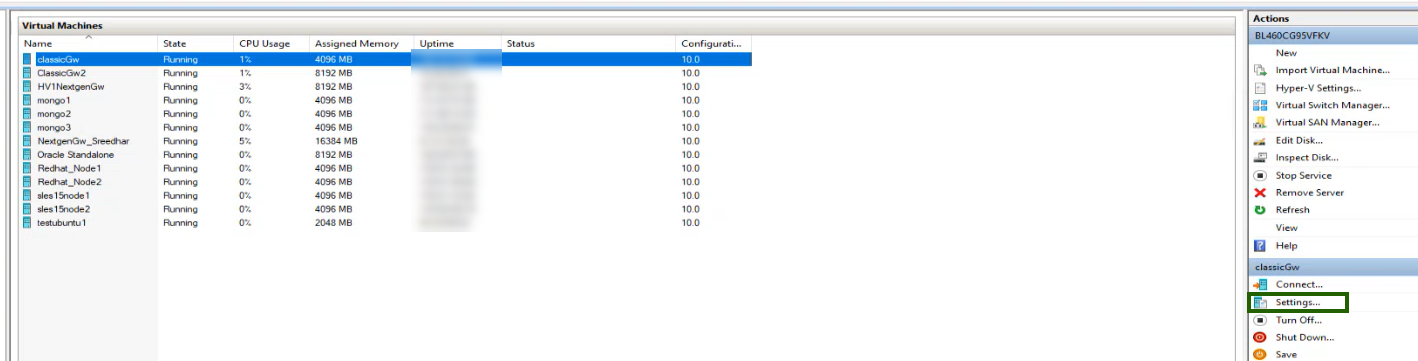
Step 5: Adjust CPU Allocation
Select the VM and click Settings to open the settings window.
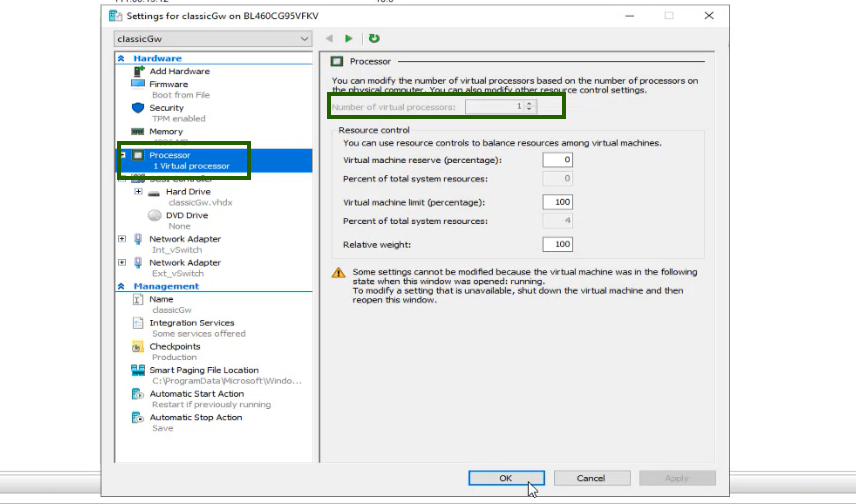
In the settings window, go to Processor.
Under “Number of virtual processors”, set the value to 4 vCPUs.
Click OK to save changes.
Step 6: Connect to the VM
- From the VM list, select the newly created VM.
- Click Connect to open the console.
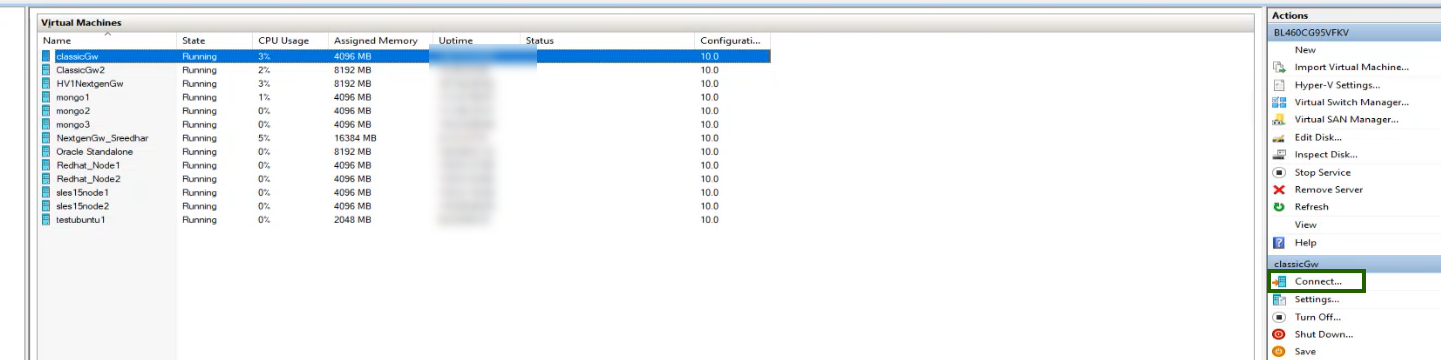
- Start the VM to begin the Gateway ISO installation.
In this section, you will find a detailed walkthrough for deploying the OpsRamp NextGen Gateway as a virtual machine (VM) on a KVM hypervisor.
Step 1: Create the Disk Image
- Log in to your KVM hypervisor with valid username/password.
- Go to your ISO folder and then download iso with below command :
wget https://opsramp-gateway.s3.us-east-2.amazonaws.com/20.0.0/OG_2204_20.0.0-202509231038-java-11.iso - Create a new disk image for the VM using the following command.
qemu-img create -f qcow2 gateway.img 60G
-f qcow2→ Specifies the QCOW2 disk image format.60G→ Sets the disk size to 60 GB.
Step 2: Create the VM XML Definition
Create an XML file, for example gateway.xml, to define the VM’s configuration. This definition specifies the VM’s resources, boot order, and device settings.
<domain type='kvm' id='1'>
  <name>classic20-gateway</name>
  <memory unit='KiB'>8388608</memory>
  <currentMemory unit='KiB'>8388608</currentMemory>
  <vcpu placement='static'>6</vcpu>
  <os>
    <type arch='x86_64'>hvm</type>
<boot dev='hd'/>
    <boot dev='cdrom'/>
  </os>
  <features>
    <acpi/>
    <apic/>
    <pae/>
  </features>
  <clock offset='utc'/>
  <on_poweroff>destroy</on_poweroff>
  <on_reboot>restart</on_reboot>
  <on_crash>destroy</on_crash>
  <devices>
    <emulator>/usr/bin/kvm-spice</emulator>
    <disk type='file' device='disk'>
      <driver name='qemu' type='qcow2' cache='none'/>
      <source file='/data/os/classic-gateway-20.0.0.img'/>
  <target dev='vda' bus='ide'/>
    </disk>
    <disk type="file" device="cdrom">
    <source file="/data/iso/OG_2204_20.0.0-202509231038-java-11.iso"/>
<target dev="hdc" bus="ide"/>
<readonly/>
    </disk>
    <interface type='direct'>
      <source dev='bond0.vlan999' mode='bridge'/>
      <model type='virtio'/>
    </interface>
    <serial type='pty'>
      <target port='0'/>
    </serial>
    <console type='pty' tty='/dev/pts/1'>
      <target type='serial' port='0'/>
    </console>
    <input type='mouse' bus='ps2'/>
    <input type='keyboard' bus='ps2'/>
    <graphics type='vnc' port='-1' autoport='yes' listen='0.0.0.0'>
      <listen type='address' address='0.0.0.0'/>
    </graphics>
  </devices>
</domain>
Step 3: Register the Virtual Machine with KVM
This step registers the virtual machine configuration in KVM using the above XML definition file. Registering the VM makes it known to the hypervisor so it can be started and managed.
Run the following command:
virsh define gateway.xmlStep 4: Verify the Virtual Machine Registration
This step confirms that the virtual machine has been successfully registered with KVM and is available for management, even if it is not currently running.
Run the following command:
virsh list --allStep 5: Start the Virtual Machine
This step powers on the virtual machine so the operating system can boot and the VM becomes operational.
Run the following command:
virsh start gatewayStep 6: Retrieve the VNC Display Port
This step identifies the VNC display port assigned to the virtual machine, which is required to access the VM’s console.
Run the following command:
virsh vncdisplay gatewayStep 7: Connect to the Virtual Machine Console
Use a VNC client to access the virtual machine’s console by connecting to the host system’s IP address and the VNC port obtained in the previous step. This allows you to interact directly with the VM.
Example command:
vncviewer <host-ip>:<vnc-port>Step 8: Assign an IP Address to the Virtual Machine
Inside the virtual machine, configure a static IP address (for example, 172.xx.xxx.xx) based on your network requirements. This ensures the VM is reachable on the network.
Step 9: Register the Gateway
After the virtual machine is running and has a valid IP address, proceed with registering the OpsRamp Gateway according to your environment’s registration process.
This page documents the workflow to deploy OpsRamp NextGen Gateway on HPE VME using ISO images, and then proceed with standard gateway registration.
Step 1: Verify/Enable Required HPE VME Cloud Settings
You need to ensure that the following cloud settings are enabled for a smooth installation of OpsRamp NextGen gateway.
- Log in to HPE VME.
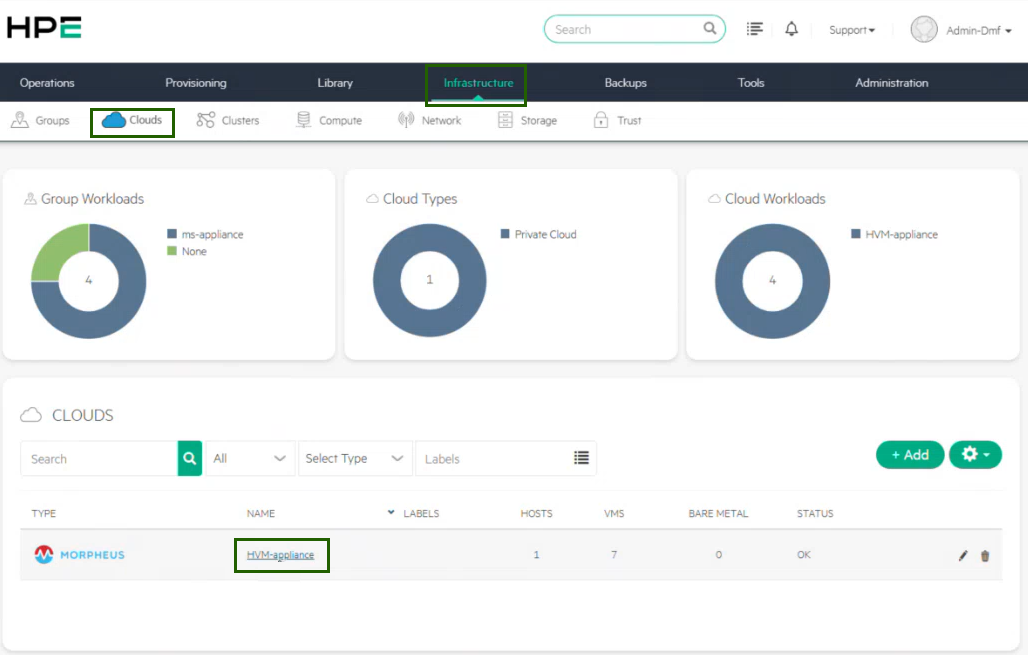
- Navigate to Infrastructure > Clouds. In the Clouds type, you will see the cloud configuration entry (here, HVM-appliance).
- Click HVM-appliance.
Click Edit.
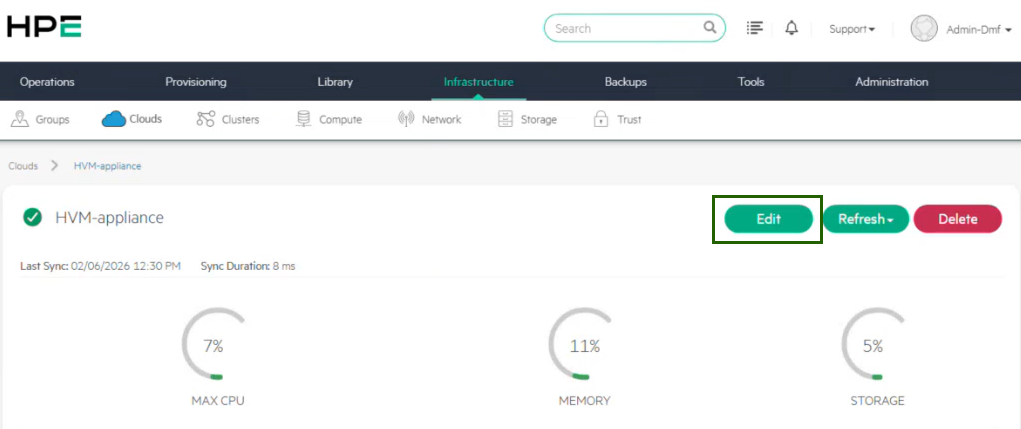
In the EDIT CLOUD page, ensure all the required options are enabled (as per your VME environment), listed in the table below.
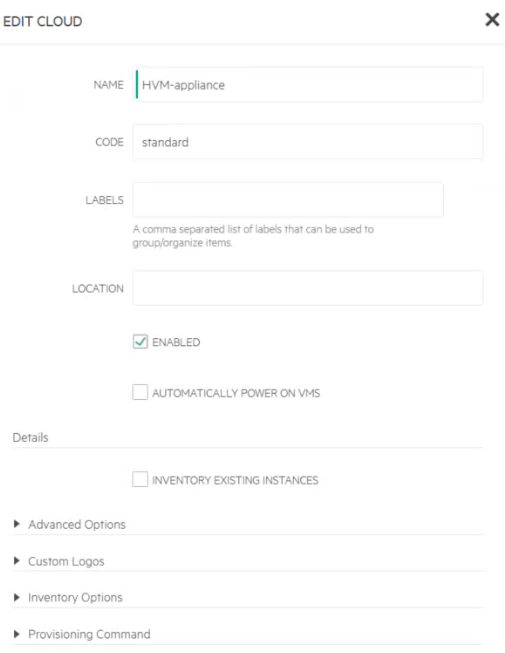
| Field | Select |
|---|---|
| Location | Enabled |
| Advanced Options |
|
Step 2: Download the NextGen Gateway ISO
To download the NextGen Gateway ISO from OpsRamp Portal, follow the steps below:
In the OpsRamp portal, select your client from All Clients.
Navigate to Setup > Account > Collector Profile.
On the Collector Profiles page, click + ADD.

On the configuration page, enter the following details:
- Profile Name: Provide a name for the profile you are creating.
- Profile Type: By default, the Standard profile type is selected.
- Description: Add a short description for the profile. (Optional)
- Gateway Collector (NextGen): Select the VIRTUAL APPLIANCE (ISO) tile. You can also choose the desired Gateway version from the available options from the dropdown.
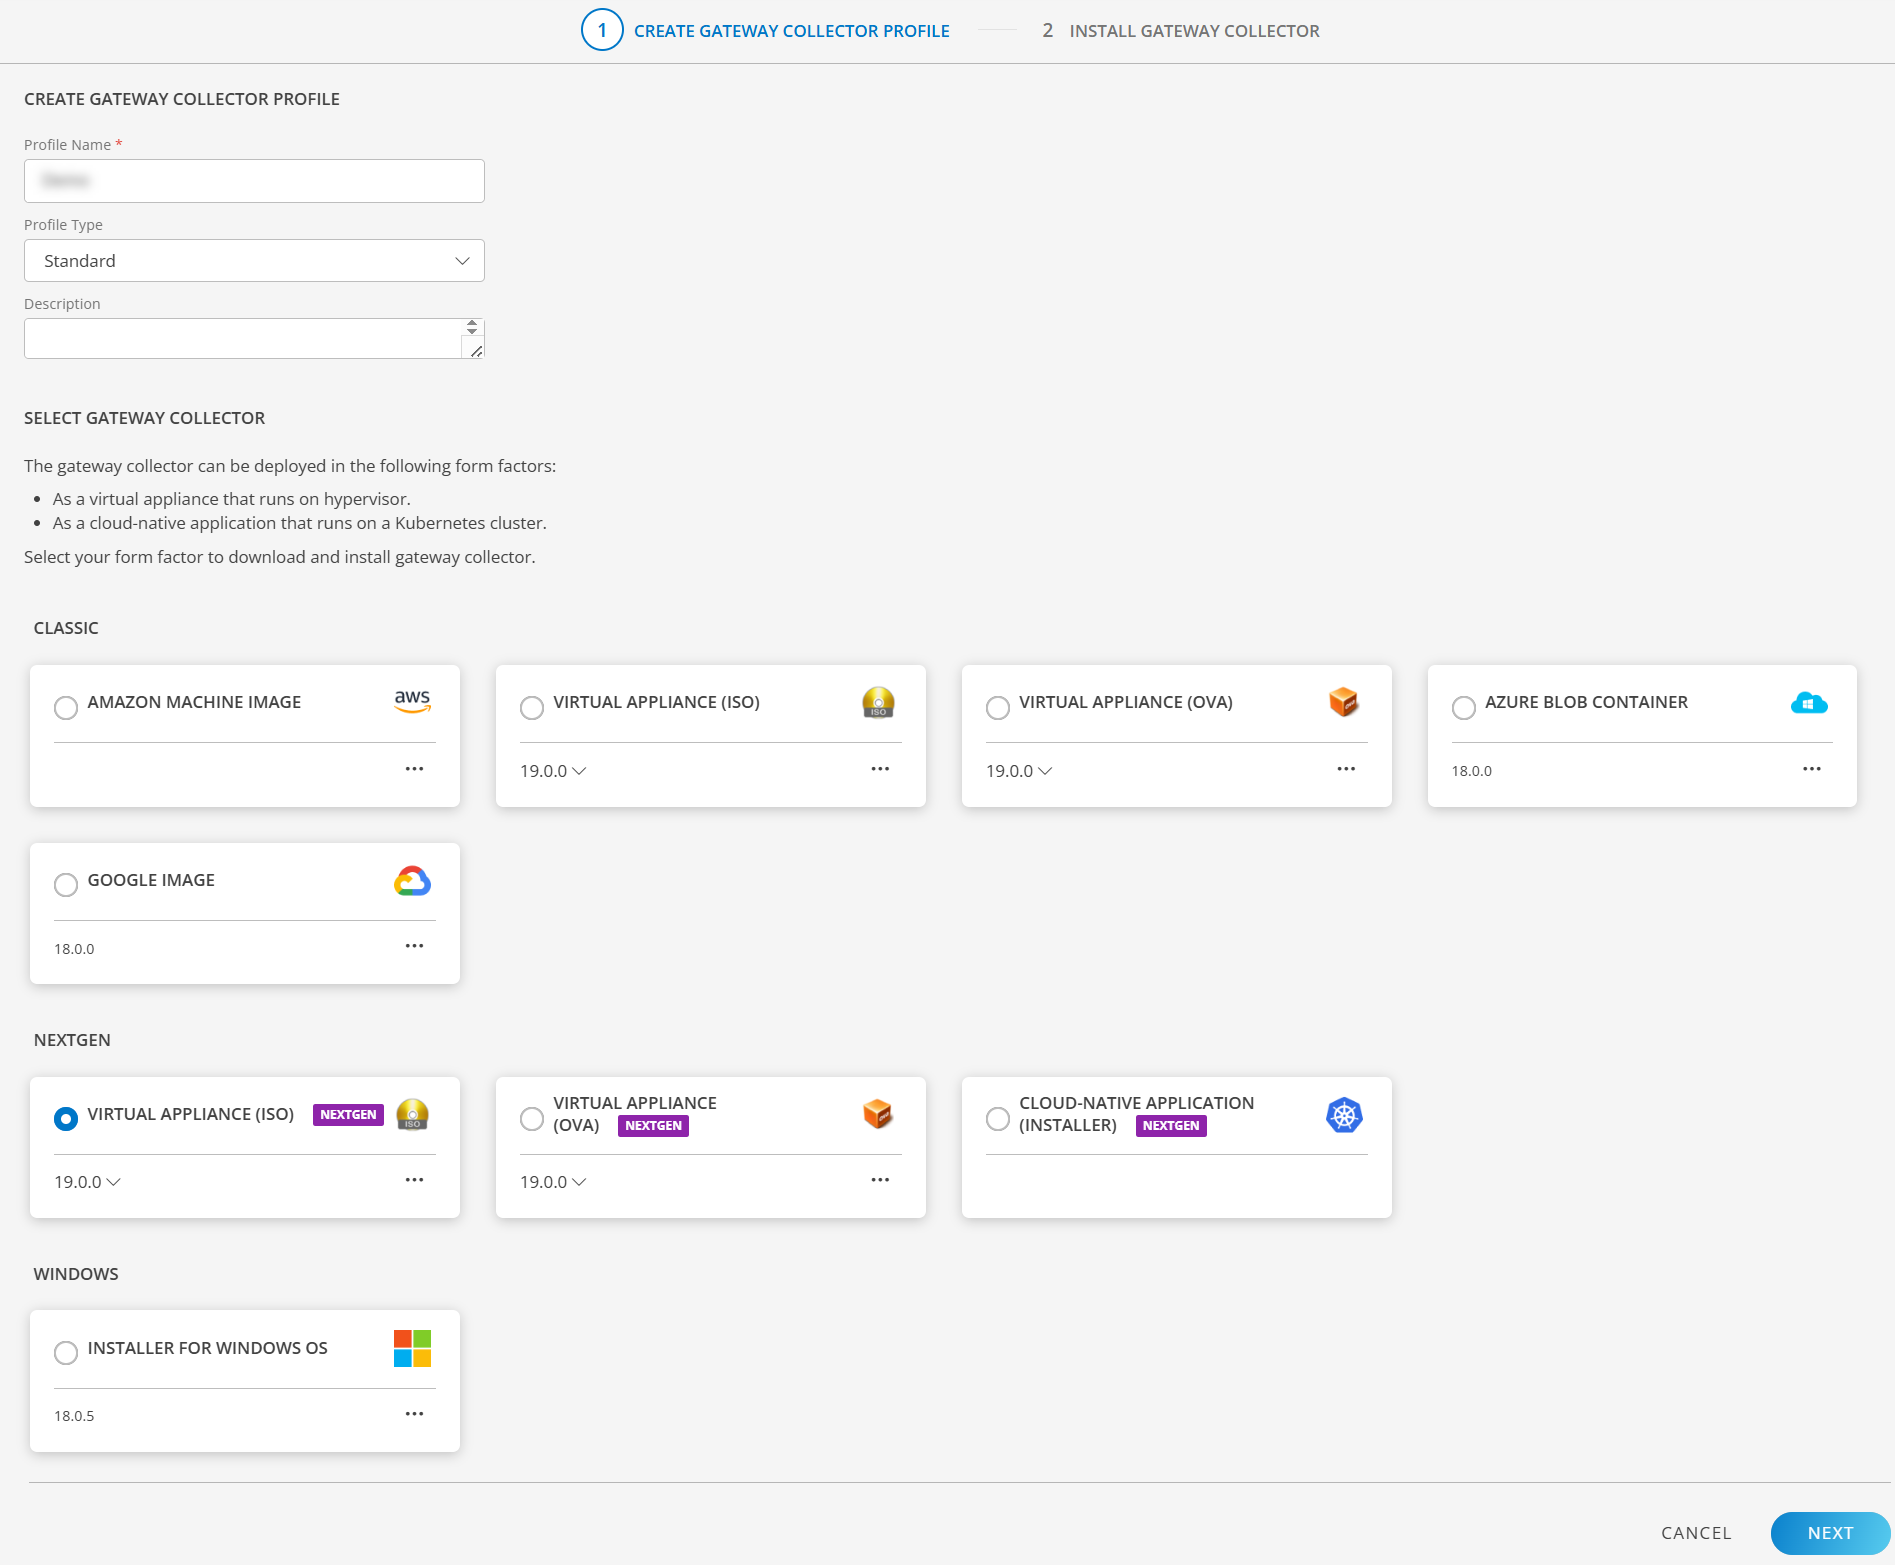
- Click NEXT.
- Download the NextGen Gateway ISO by clicking on the VIRTUAL APPLIANCE (ISO) tile.
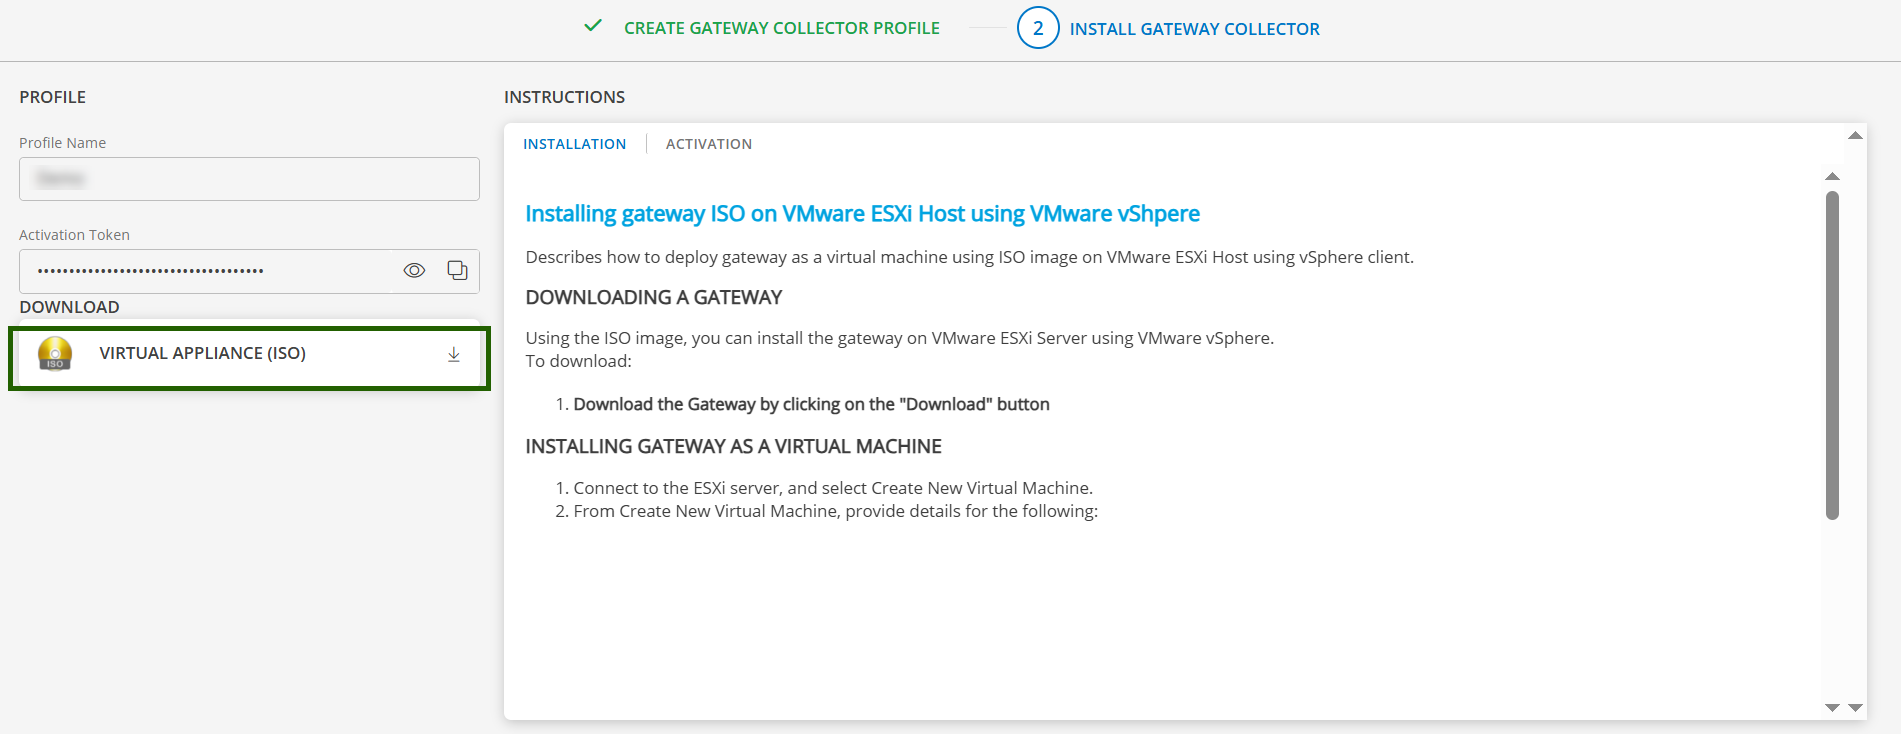
- Once the ISO is downloaded, you can proceed to the installation Step.
Step 3: Create ISO image in the VME Library
Navigate to Library > Virtual Images.
The Virtual Images page displays multiple image types.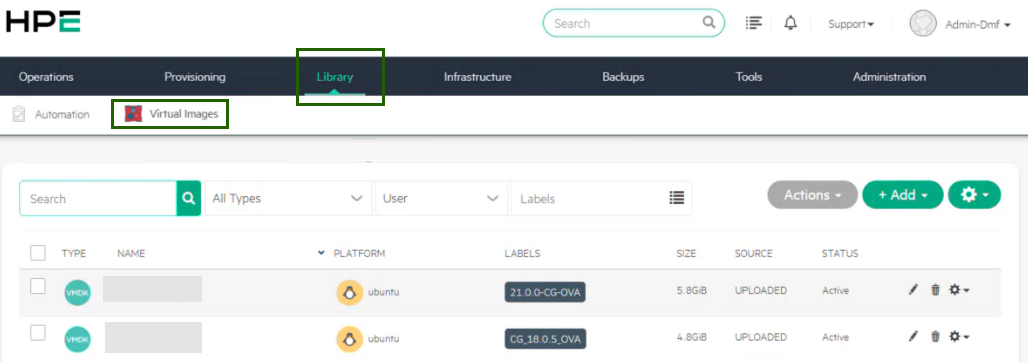
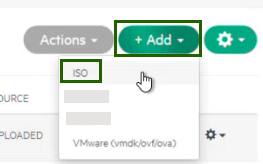
Select +Add > ISO.
In the UPLOAD VIRTUAL IMAGE page, enter the following details:
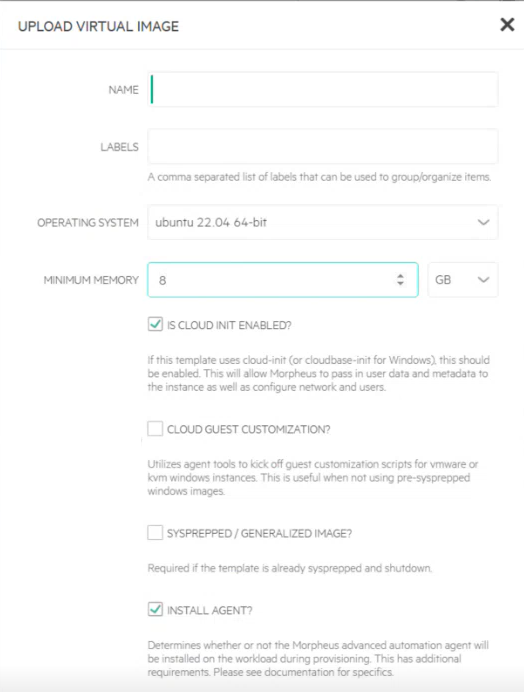
- Name: Name for ISO image.
- Labels: A short label/description.
- Operating System: Ubuntu 22.04 (64-bit)
- Minimum memory: 8 GB
- Select IS CLOUD INIT AVAILABLE? and INSTALL AGENT?
- Select File for Create Image type.
- Click Add File.
- Upload the downloaded Gateway ISO file.
- In the Advanced drop-down, select VIRTIO DRIVERS LOADED? and VM TOOLS INSTALLED?.
- Click Save Changes.
You have now created the ISO image, which is available in the Library list.
Step 4: Deploy (spin up) the Gateway VM (Instance)
In VME environment, navigate to Provisioning > Instances.
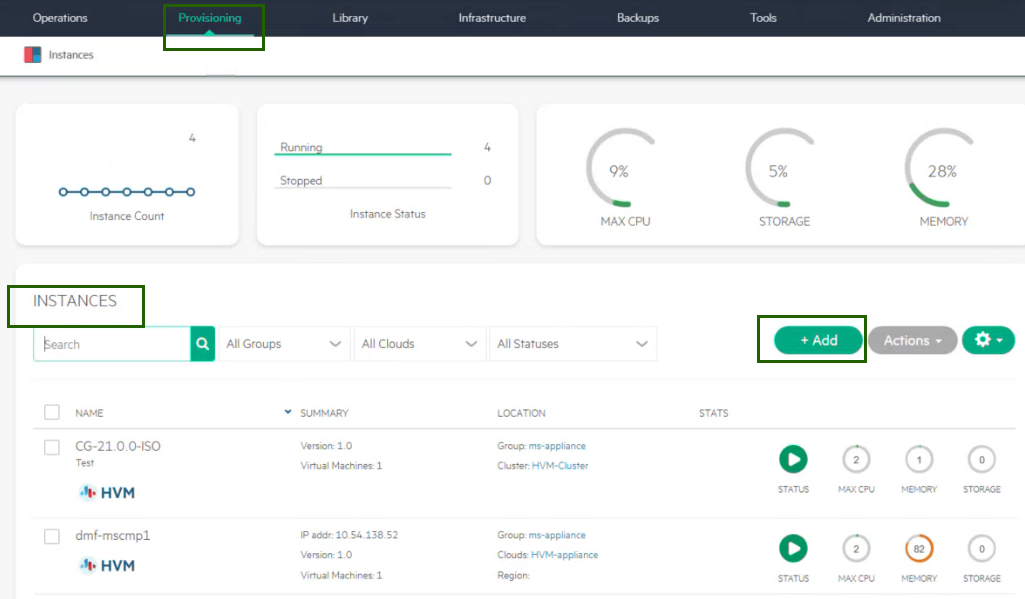
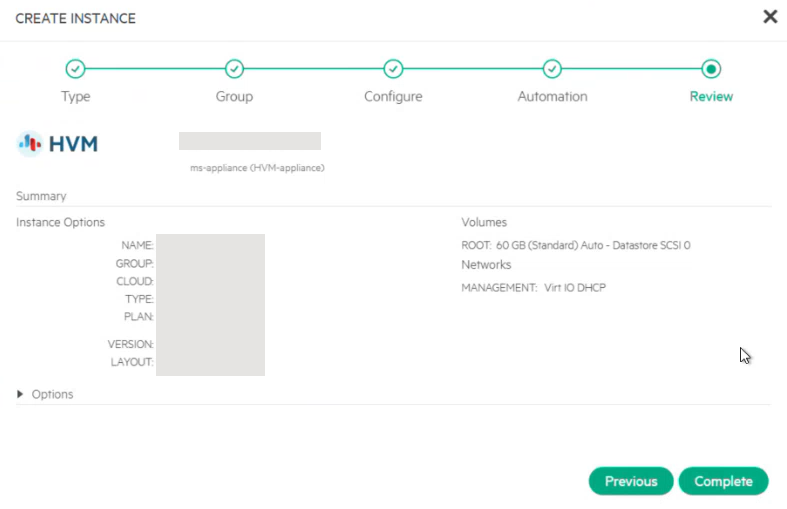
Click Add. The CREATE INSTANCE page is displayed.
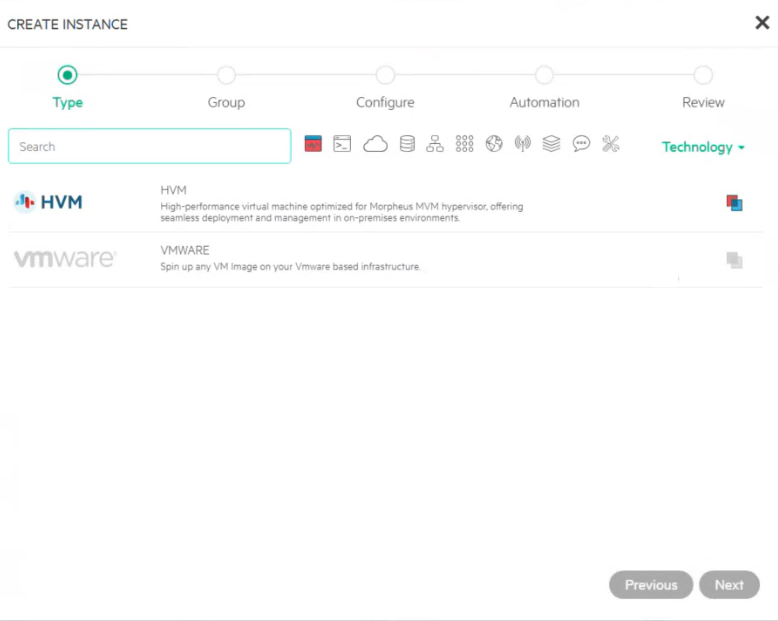
Select the HPE VME / HVM option.
Enter instance name in the CREATE INSTANCE page.
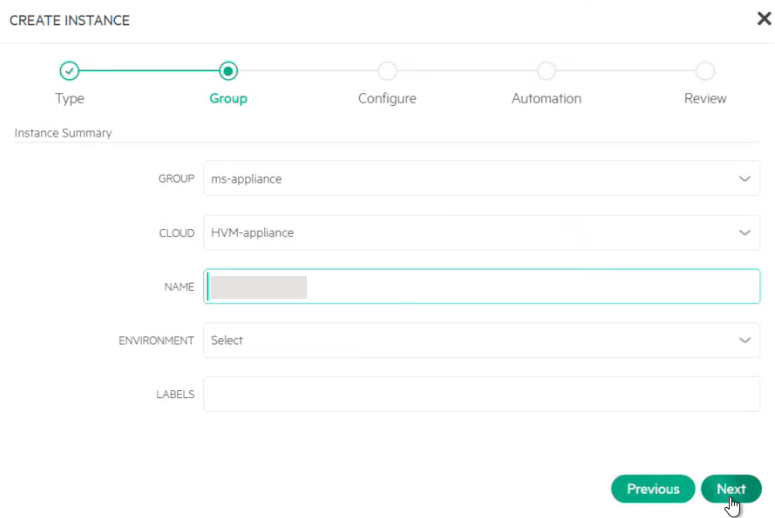
Click Next.
Enter the following configurations:
- Plan: 4 CPU / 16 GB Memory
- Resource Pool: HVM Cluster
- Volumes: root/60 GB/Standard
- Networks: Management
- Image: Select the ISO image you just created.
- Select Host from the drop-down.
- In Advanced Options drop-down, select:
QEMU ARGUMENTS - ATTACH VIRITO DRIVERS
- Click Next. You can skip the automation configuration options and click Next.
- Review the complete configuration and then click Complete.
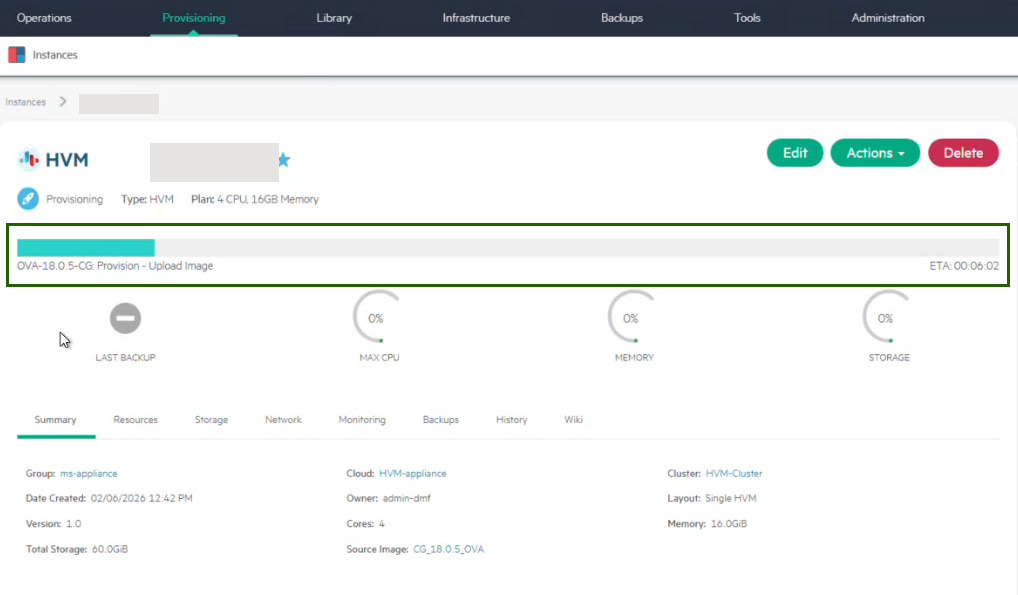
Step 5: Monitor Deployment and Confirm VM Status
After submission, the VM will show as Creating in the Library list. Click the VM and you can see the progress. When complete, status will show as green.
Step 6: Get the Gateway IP address (for Registration)
- In Instances, click the instance name.
- From Actions, select Open Console.
- Locate the IP address shown in the console.
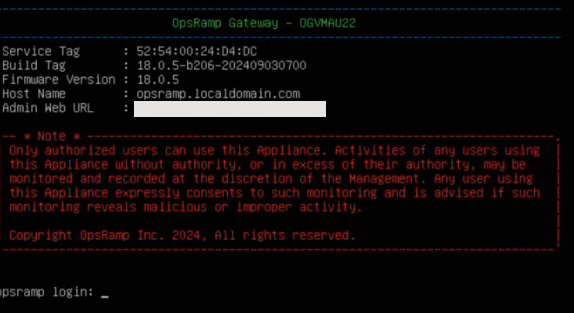
4. Use this IP for the standard OpsRamp gateway registration flow.
Step 7: Register the Gateway
Refer to the Install Gateway Using OpsRamp Bootstrap Tool page for step-by-step instructions for completing the Gateway installation.