Overview
This guide provides step-by-step instructions for migrating from a Classic Gateway to a NextGen Gateway in OpsRamp. Please ensure you meet the prerequisites and understand the limitations before proceeding.
Prerequisites
- IP Address Assignment: Assign the IP address of the existing Classic Gateway to the newly built NextGen Gateway once the old gateway is shut down.
- Access to Classic Gateway: Obtain the configuration data from the existing Classic Gateway.
- Configure prerequisites as outlined in the Common Prerequisites document.
Limitations
- SIP (Session Initiation Protocol) Monitoring: The NextGen Gateway does not support SIP monitoring.
- Alert Resolution: Any Critical/Warning alerts generated by the Classic Gateway will not be resolved by the NextGen Gateway if the resource returns to normal.
- Downtime: The time it takes to detach and reconnect the Gateway is the downtime, and it may result in a loss of 5 to 10 minutes of data in addition to the downtime.
Migration Steps
Step 1: Retrieve Classic Gateway configuration data
- In a web browser, enter the Gateway URL. For example:
https://<Gateway IP address>:5480. - Log in using your username and password.
- In the Administration Menu, note the following configuration setup data:
- IP Address
- Network Configuration
- Date & Time
- Registration details
- Log out from the Classic Gateway.
Step 2: Download the NextGen Gateway ISO/OVA
Download the Gateway ISO or OVA based on the requirements. This will install the Gateway on your computer.
Refer the below documents to download the ISO/OVA:
- NextGen Gateway ISO
- NextGen Gateway OVA
Step 3: Configure and install the Nextgen Gateway Virtual Machine
Connect to the ESXi server.
- Open a web browser and navigate to the ESXi server’s IP address or hostname.
- Log in using your administrator credentials.
Create a New Virtual Machine.
- Select “Create New Virtual Machine":
- On the ESXi dashboard, click on “Create/Register VM”.
- Choose the option “Create a new virtual machine” and click Next.
- Enter Virtual Machine Details:
- Configuration: Select Typical for a guided setup.
- Name and Location: Enter a unique name for your virtual machine (e.g., GatewayVM).
- Select DataCenter: Choose esxi under the DataCenter section.
- Select Datastore:
- In the Select Storage section, choose a destination storage location to store the virtual machine files. This is typically a datastore available on the ESXi server.
- Select ESXi Compatibility:
- Choose ESXi 6.7 and later as the compatibility version.
- Select Guest OS:
- Guest OS Family: Select Linux.
- Guest OS Version: Select Ubuntu Linux (64-bit).
- Select “Create New Virtual Machine":
Configure Virtual Machine Hardware.
- Create a Disk:
- CPUs: Enter the number of CPUs. The recommended configuration is 4 CPUs.
- Memory: Enter the memory size. The recommended size is 8 GB.
- Disk Size: Enter the disk size. The recommended size is 60 GB.
- Configure CD/DVD Drive:
- New CD/DVD: Select Datastore ISO File.
- Browse to the location where you downloaded the gateway ISO file and select it.
- Check the “Connect at power on” checkbox.
- Verify Remaining Hardware Details:
- Review the hardware configuration to ensure all settings are correct.
- Create a Disk:
Complete the Virtual Machine Setup.
- Ready to Complete:
- Review the configuration summary of the new virtual machine.
- Ensure all details (e.g., CPUs, memory, disk size, and ISO file) are correct.
- Click Finish:
- Click Finish to create the virtual machine.
- The ESXi server will display the new virtual machine in the inventory.
- Ready to Complete:
Power On the Virtual Machine
- Locate the newly created virtual machine in the ESXi inventory.
- Right-click on the virtual machine and navigate to Power > Power On.
- The virtual machine will start, and you can proceed with further configurations as needed.
Step 4: Proxy Configuration (Optional)
Follow the below steps to setup the Node Level Proxy in NextGen Gateway:
- Log in to the Gateway device through SSH.
- Use the following command to edit the environment file.
vi /etc/environment - Add the following lines to the environment file.
HTTPS_PROXY=http://<proxy-ip>:<>proxy-port> NO_PROXY=localhost,127.0.0.1,10.43.0.1,<gateway-ip> HTTP_PROXY=http://<proxy-ip>:<>proxy-port> - Save the environment file and exit the editor.
- Log out and log back in to the gateway to apply the changes.
Step 5: Detach the Existing Classic Gateway
Before you detach the Gateway, make sure Web Service Agent are not disabled in your management profile.
To detach the existing Gateway, follow the below steps:
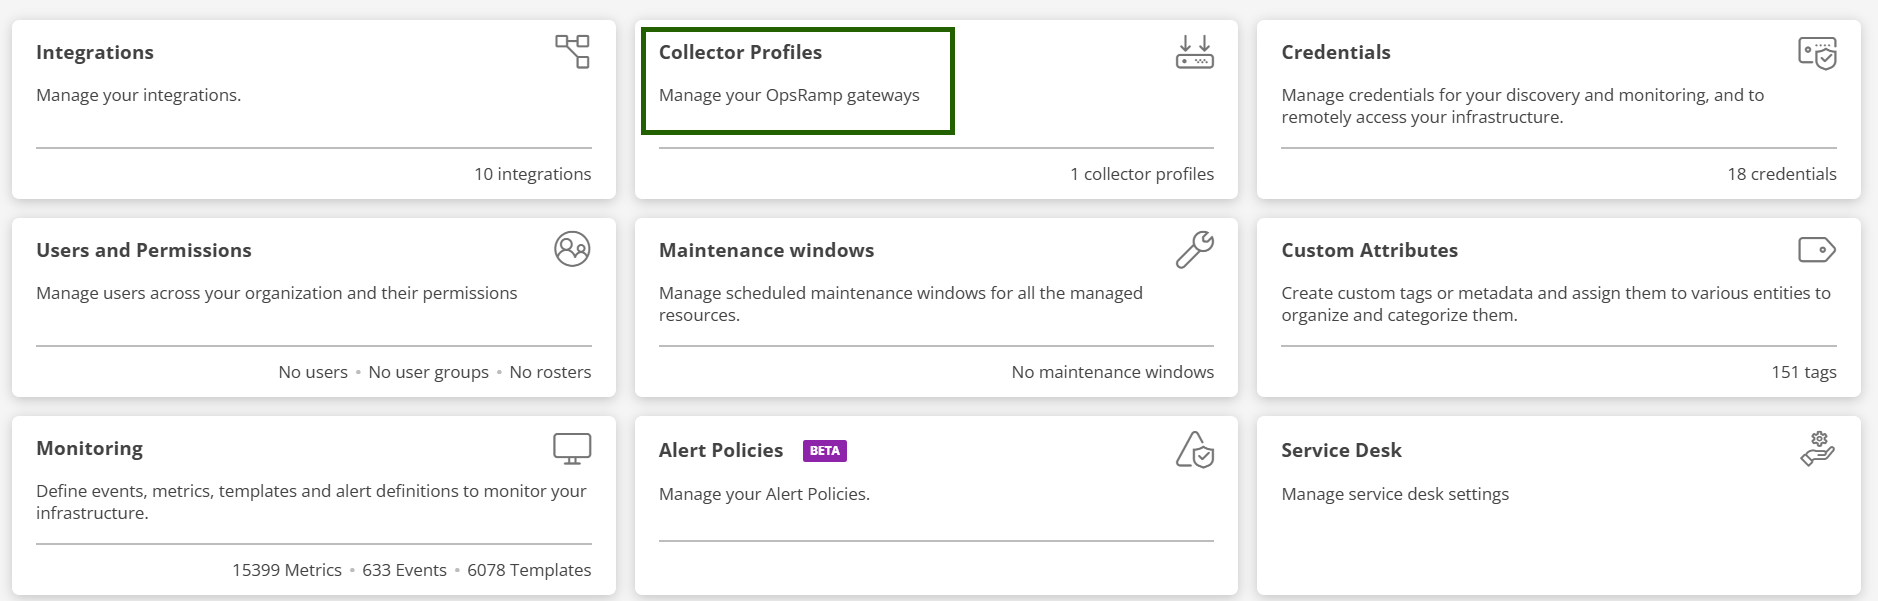
- Navigate to Setup > Account. The Account Details page is displayed.
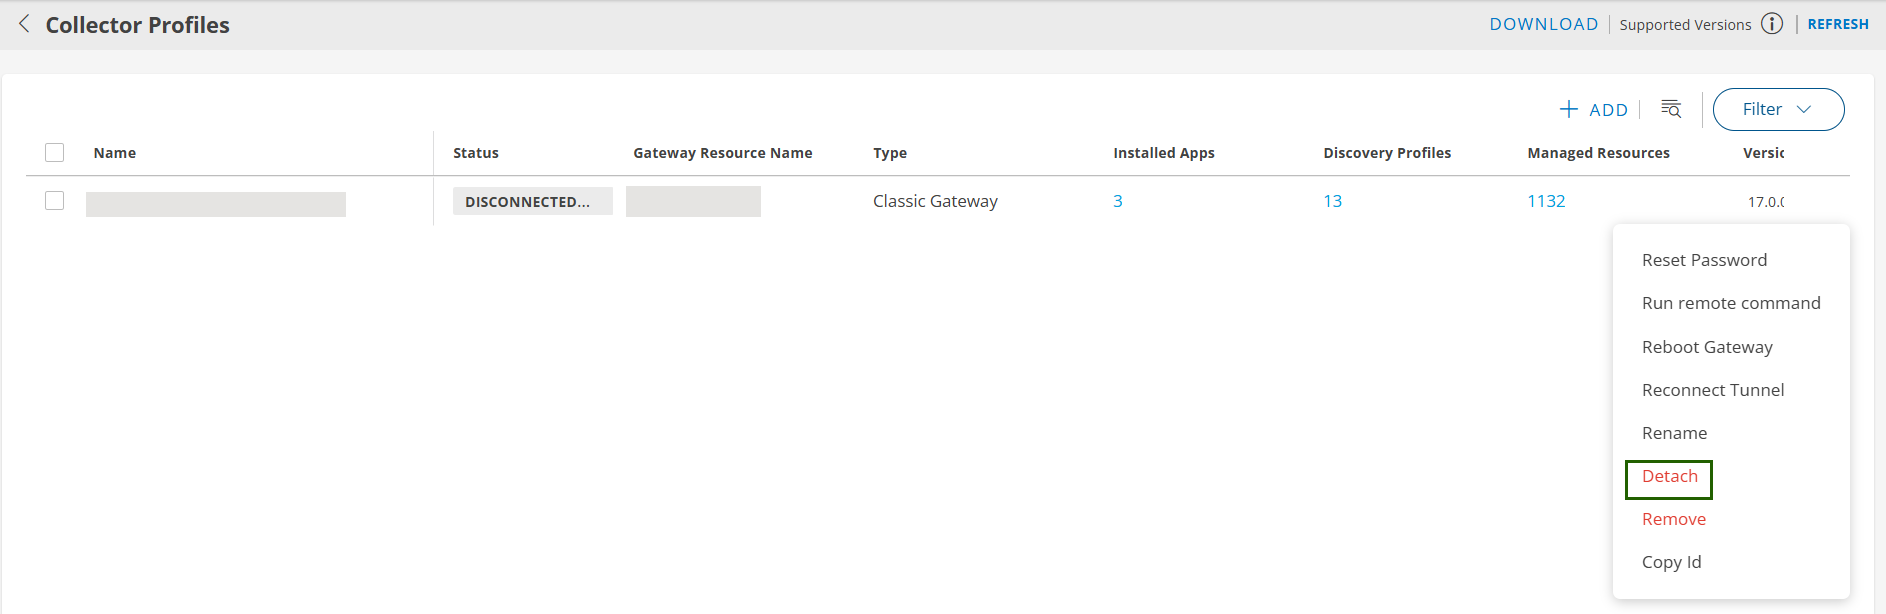
- Click the Collector Profiles tile. The Collector Profiles page is displayed.
- Select the Gateway profile you want to detach. Remember this profile for step 5.
- Click Detach.
- On the Infrastructure page, make sure no other available device has the same gateway IP address. If a device with the same IP address exists, delete the device.
- Shut down the Gateway.
Step 6: Attach the New Gateway
- In OpsRamp, navigate to Setup > Account > Collector Profiles.
- Select the Collector profile from which you detached the old Gateway.
- Click Attach Gateway and then Copy the activation code to your clipboard.
Step 7: Configure the New Gateway
- Register the new Gateway using the bootstrap tool with the copied activation code.
- Refer the Registration Document to register the new Gateway using the bootstrap tool.
Step 8: Verify the Upgrade
Confirm the new Gateway is functioning properly by checking the following:
- Gateway status shows Connected under the Collector Profile Status.
- Under Registration Details, verify the Gateway model ID begins with ONG (e.g., ONGVMAU22).
- Confirm the firmware version reflects the latest update.
- Wait
5–10minutes, then check monitoring graphs for the Gateway and managed devices. - If the Gateway acts as a proxy for Agents, ensure Agents are active and reporting data.
- For Gateways monitoring verify recent data is being collected correctly.
- For Gateway connected resource monitoring verify recent data is being collected correctly.