Prerequisites
Before deploying the Classic Gateway virtual machine using the OpsRamp-provided ISO, ensure that your environment meets all the necessary requirements to support a successful installation and connection to the OpsRamp Cloud platform.
- Supported Hypervisor
For detailed information, refer to the Support Matrix document. - System and Server Requirements
Verify that your infrastructure meets the minimum hardware and software specifications required to run the Classic Gateway VM.
For detailed information, refer to the Prerequisites document. - Network Access and Whitelisting
To ensure seamless communication between the Gateway and the OpsRamp SaaS platform:- Whitelist the required IP addresses and URLs in your firewall or security group settings.
- For the complete list of domains and endpoints, refer to the IP Whitelist documentation.
- Whitelist the required IP addresses and URLs in your firewall or security group settings.
- Proxy Configuration (Optional)
If your organization uses a proxy server to control outbound traffic for security or compliance reasons:- To configure proxy settings, log in to the Gateway Admin UI at
https://<Gateway IP>:5480and navigate to Network > Network Connection Settings. - This ensures that all outbound requests from the Gateway (including registration and tunnel connectivity) are routed through the proxy.
- To configure proxy settings, log in to the Gateway Admin UI at
Step 1: Download the Classic Gateway OVA
To download the Classic Gateway OVA from OpsRamp Portal, follow the steps below:
- From All Clients, select a client.
- Go to Setup > Account > Collector Profile.
- Click + ADD on the Collector Profiles page.

- Enter the following details on the configuration page:
- Profile Name: Provide a name for the profile you are creating.
- Profile Type: By default, the Standard profile type is selected.
- Description: (Optional) Add a short description for the profile.
- Gateway Collector (Classic): Select the VIRTUAL APPLIANCE (OVA) tile. You can also choose the desired Gateway version from the available options.
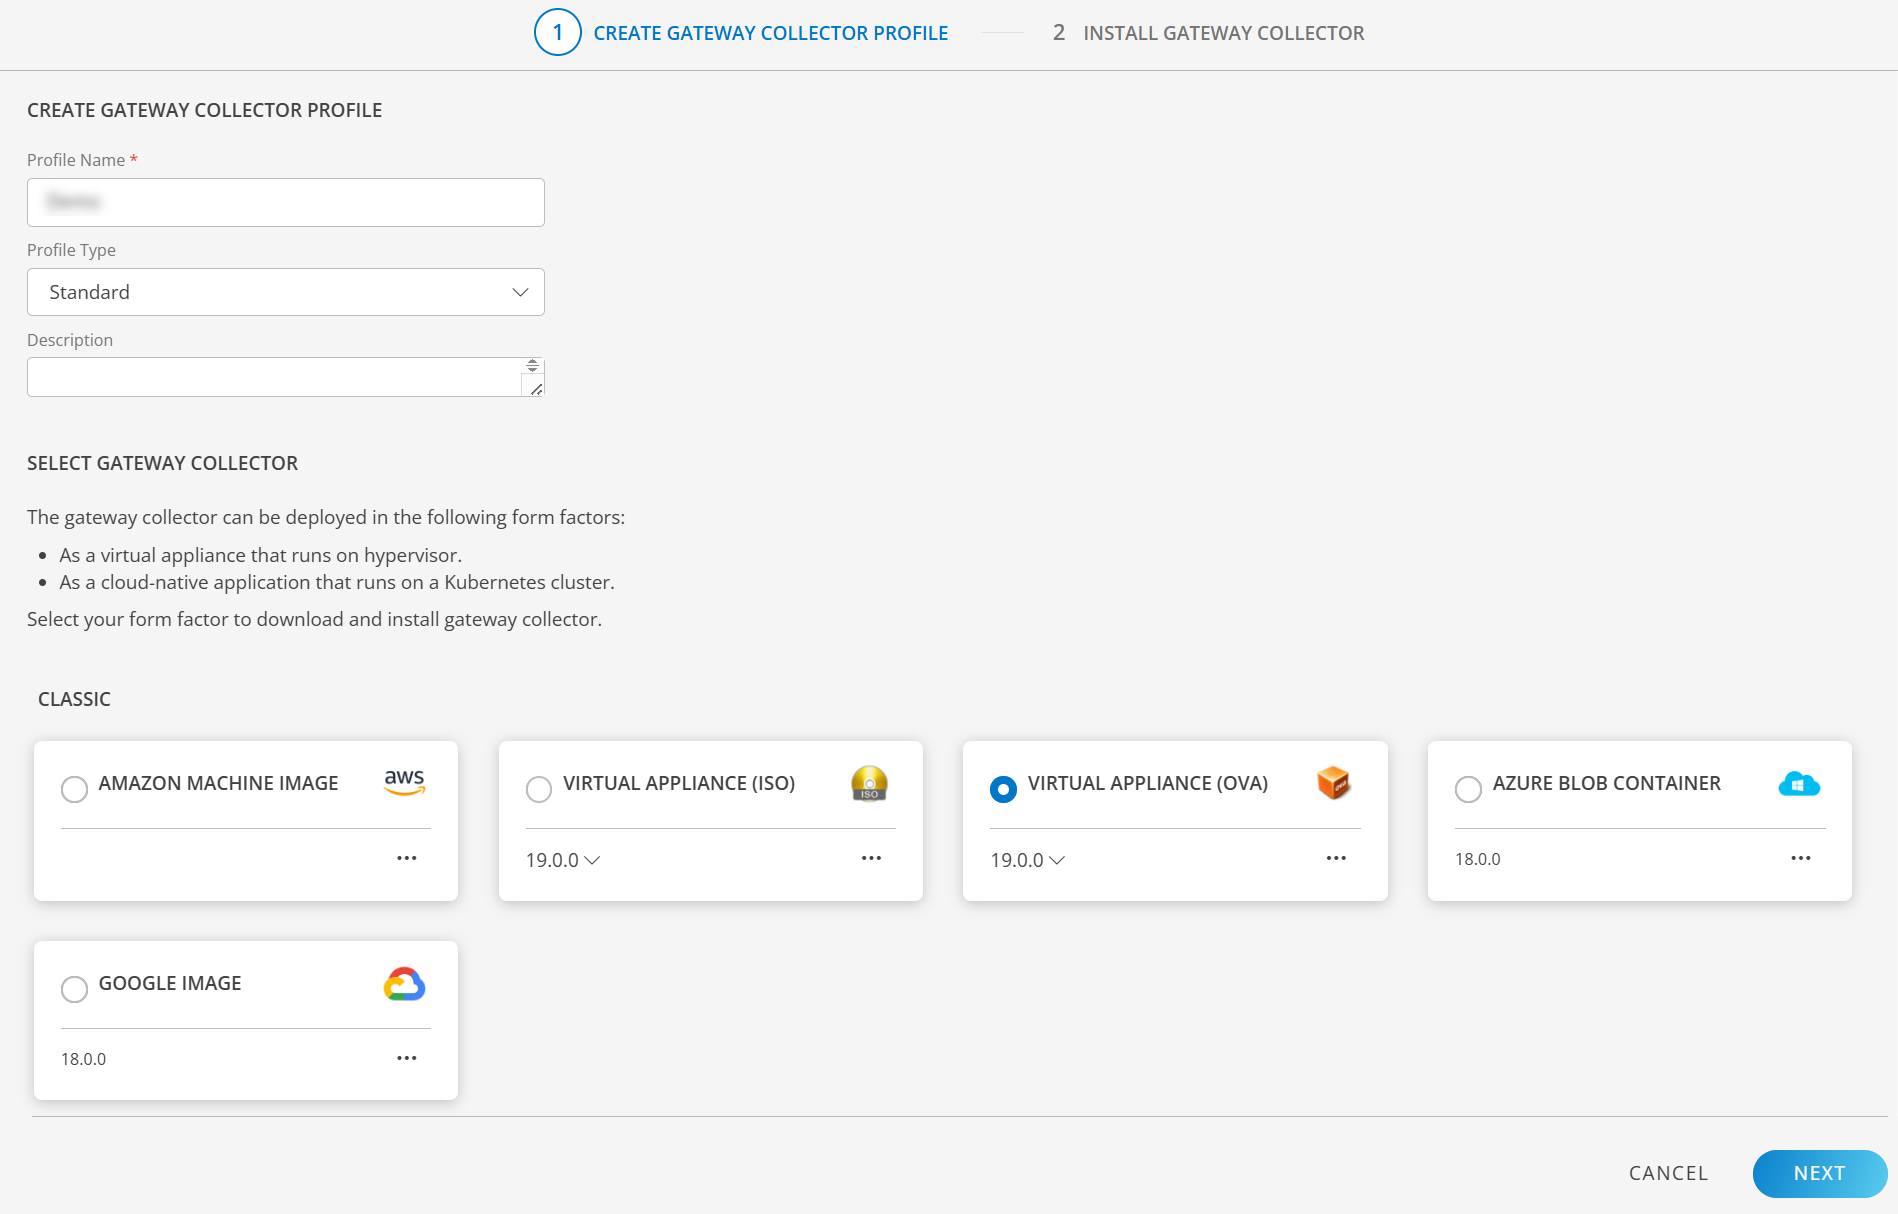
Click NEXT to proceed.
Finally, download the Gateway by clicking on the VIRTUAL APPLIANCE (OVA) tile.

- Once the OVA is downloaded, you can proceed to the installation Step.
Step 2: Prepare the Gateway VM using OVA
Refer to the Prepare Gateway VM using OVA document for step-by-step instructions to deploy the Classic Gateway as a virtual machine using an OVA image.
Step 3: Change Password
- Open the Gateway Admin UI at:
https://<Gateway IP>:5480. - From the Administration Menu, go to Password and change the password.
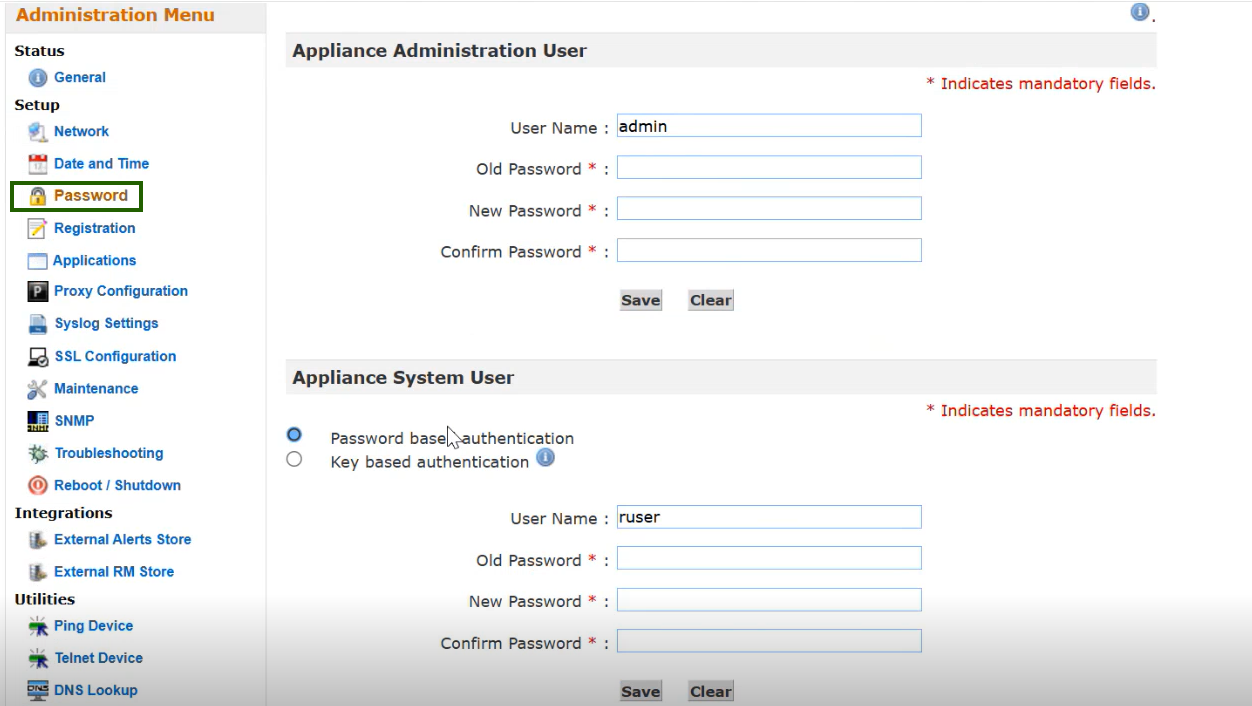
Note
- If you are accessing the Gateway Admin UI for the first time, you will be required to change the password immediately.
- For security best practices, it is strongly recommended to change the default system password right after provisioning the Gateway. This helps prevent unauthorized access.
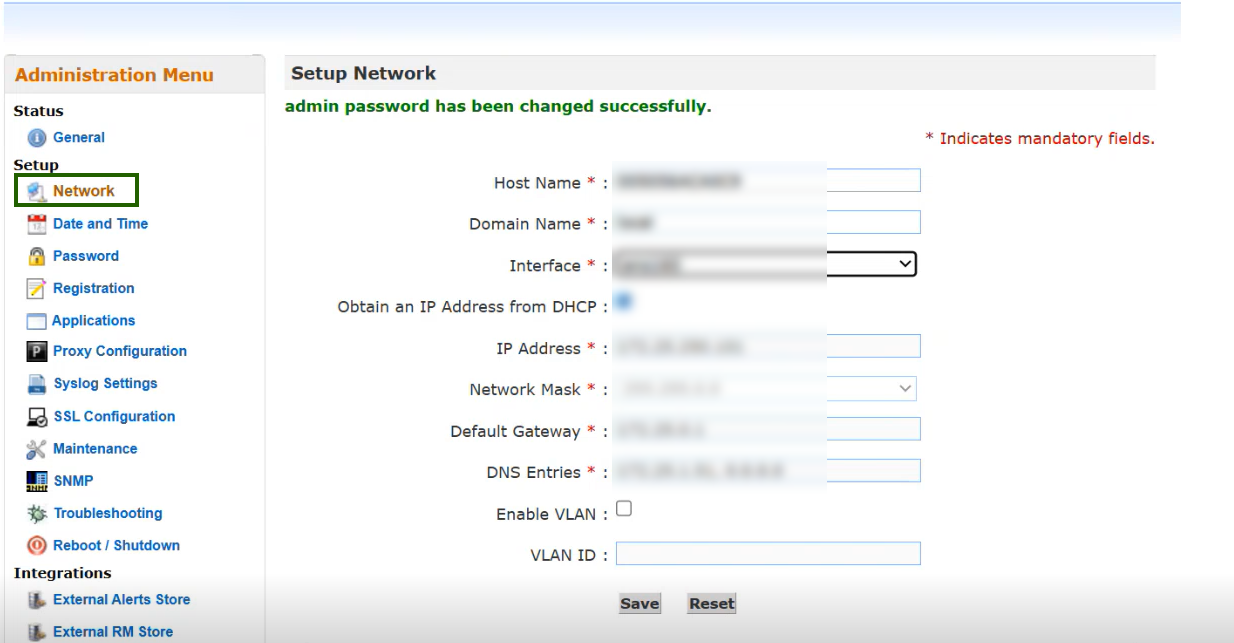
Step 4: Update Hostname and IP Address
- Open the Gateway Admin UI at:
https://<Gateway IP>:5480. - From the Administration Menu, go to Network and update the Hostname and IP Address.
Step 5: Register the Gateway
Refer to the Register the Gateway document to activate the Gateway collector. This guide provides step-by-step instructions for completing the Gateway installation.