Prerequisites
Before deploying the Gateway virtual machine using the OpsRamp-provided ISO, ensure that your environment meets all the necessary requirements to support a successful installation and connection to the OpsRamp Cloud platform.
- Supported Hypervisor
For detailed information, refer to the Support Matrix document. - System and Server Requirements
Verify that your infrastructure meets the minimum hardware and software specifications required to run the Gateway VM.
For detailed information, refer to the Prerequisites document. - Network Access and Whitelisting
To ensure seamless communication between the Gateway and the OpsRamp SaaS platform:- Whitelist the required IP addresses and URLs in your firewall or security group settings.
- For the complete list of domains and endpoints, refer to the IP Whitelist documentation.
- Whitelist the required IP addresses and URLs in your firewall or security group settings.
- Proxy Configuration (Optional)
If your organization uses a proxy server to control outbound traffic for security or compliance reasons:- To configure proxy settings, log in to the Gateway Admin UI at
https://<Gateway IP>:5480and navigate to Network > Network Connection Settings. - This ensures that all outbound requests from the Gateway (including registration and tunnel connectivity) are routed through the proxy.
- To configure proxy settings, log in to the Gateway Admin UI at
Step 1: Download the Classic Gateway ISO
To download the Classic Gateway ISO from OpsRamp Portal, follow the steps below:
- In the OpsRamp portal, select your client from All Clients.
- Navigate to Setup > Account > Collector Profile.
- On the Collector Profiles page, click + ADD.

- On the configuration page, enter the following details:
- Profile Name: Provide a name for the profile you are creating.
- Profile Type: By default, the Standard profile type is selected.
- Description: Add a short description for the profile. (Optional)
- Gateway Collector (Classic): Select the VIRTUAL APPLIANCE (ISO) tile. You can also choose the desired Gateway version from the available options from the dropdown.
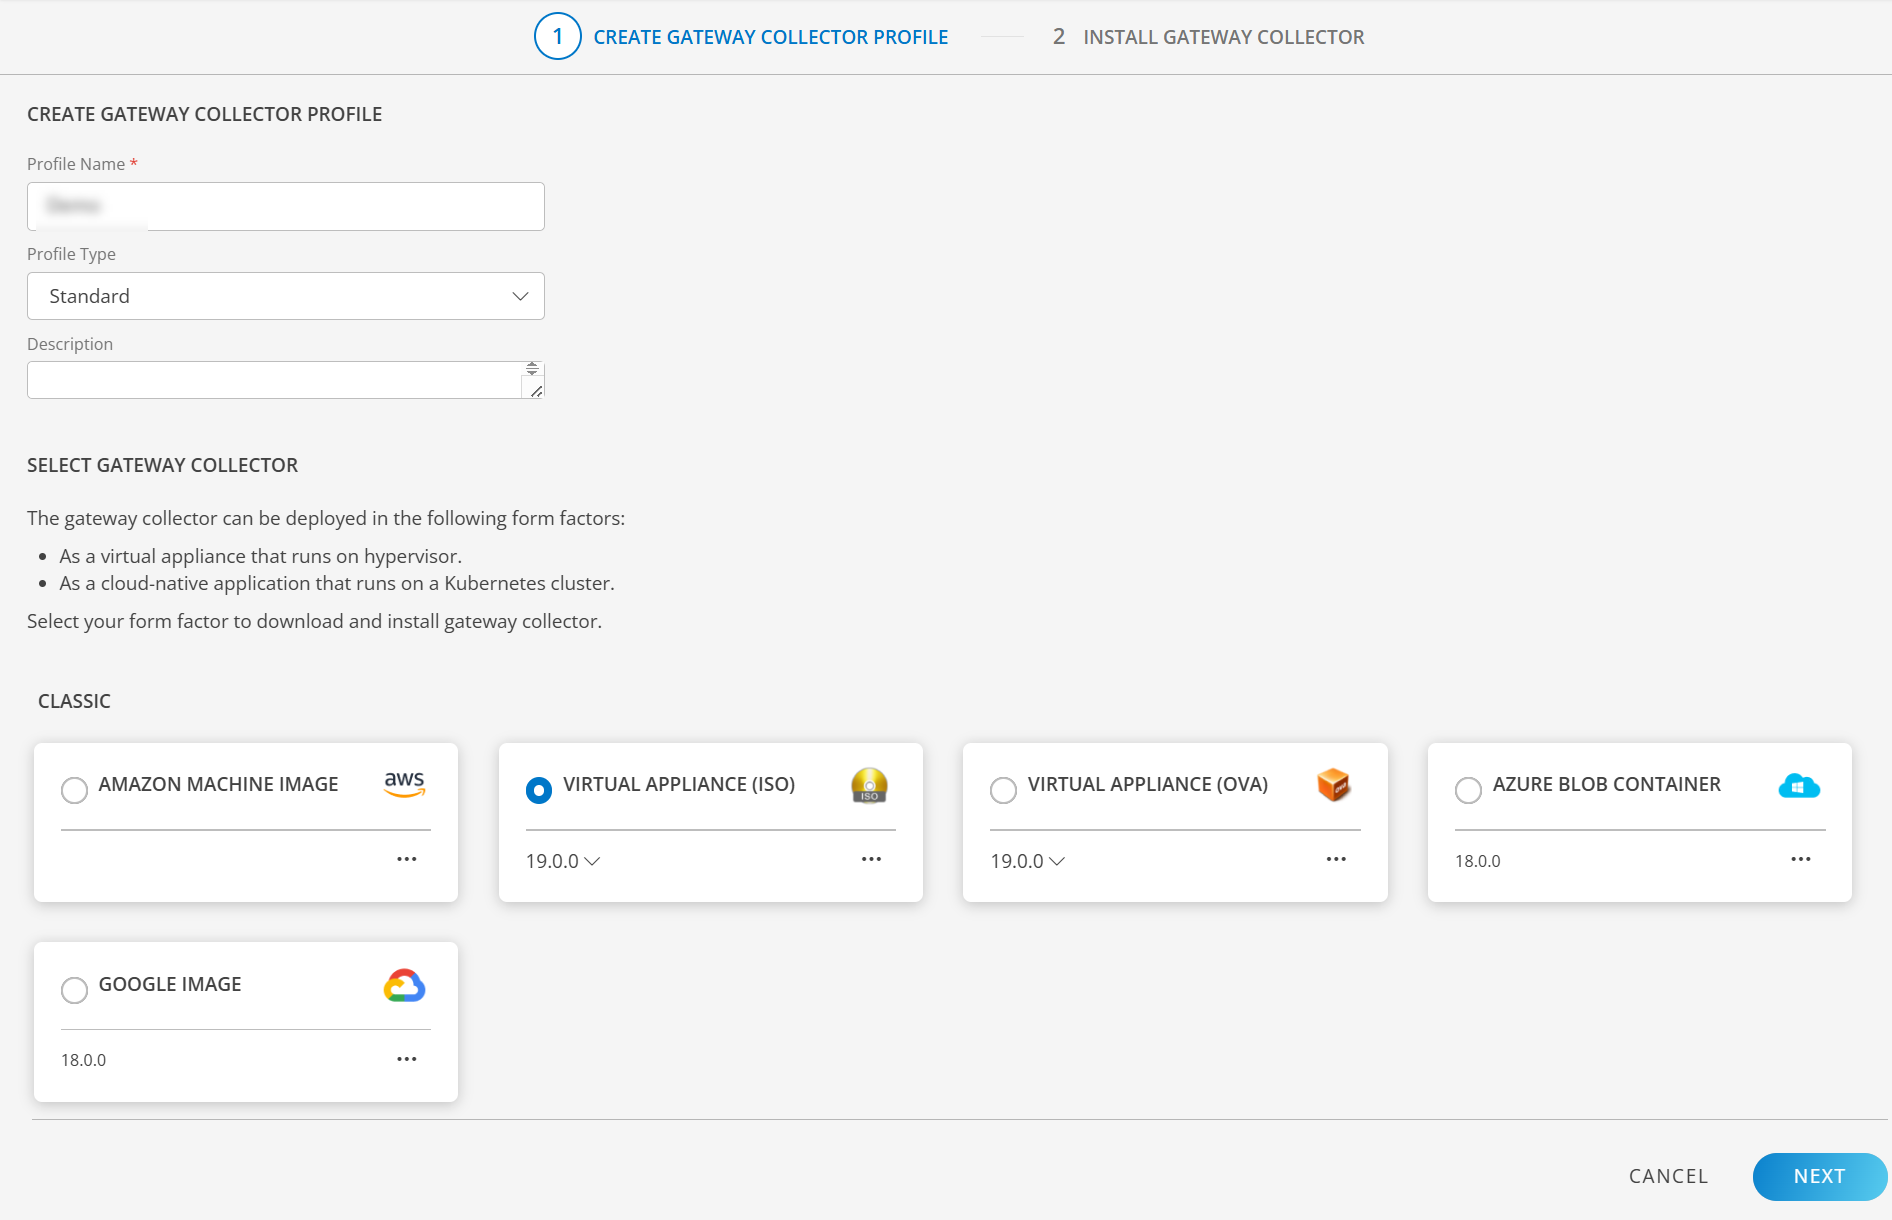
- Click NEXT to proceed.
- Finally, download the Classic Gateway ISO by clicking on the VIRTUAL APPLIANCE (ISO) tile.
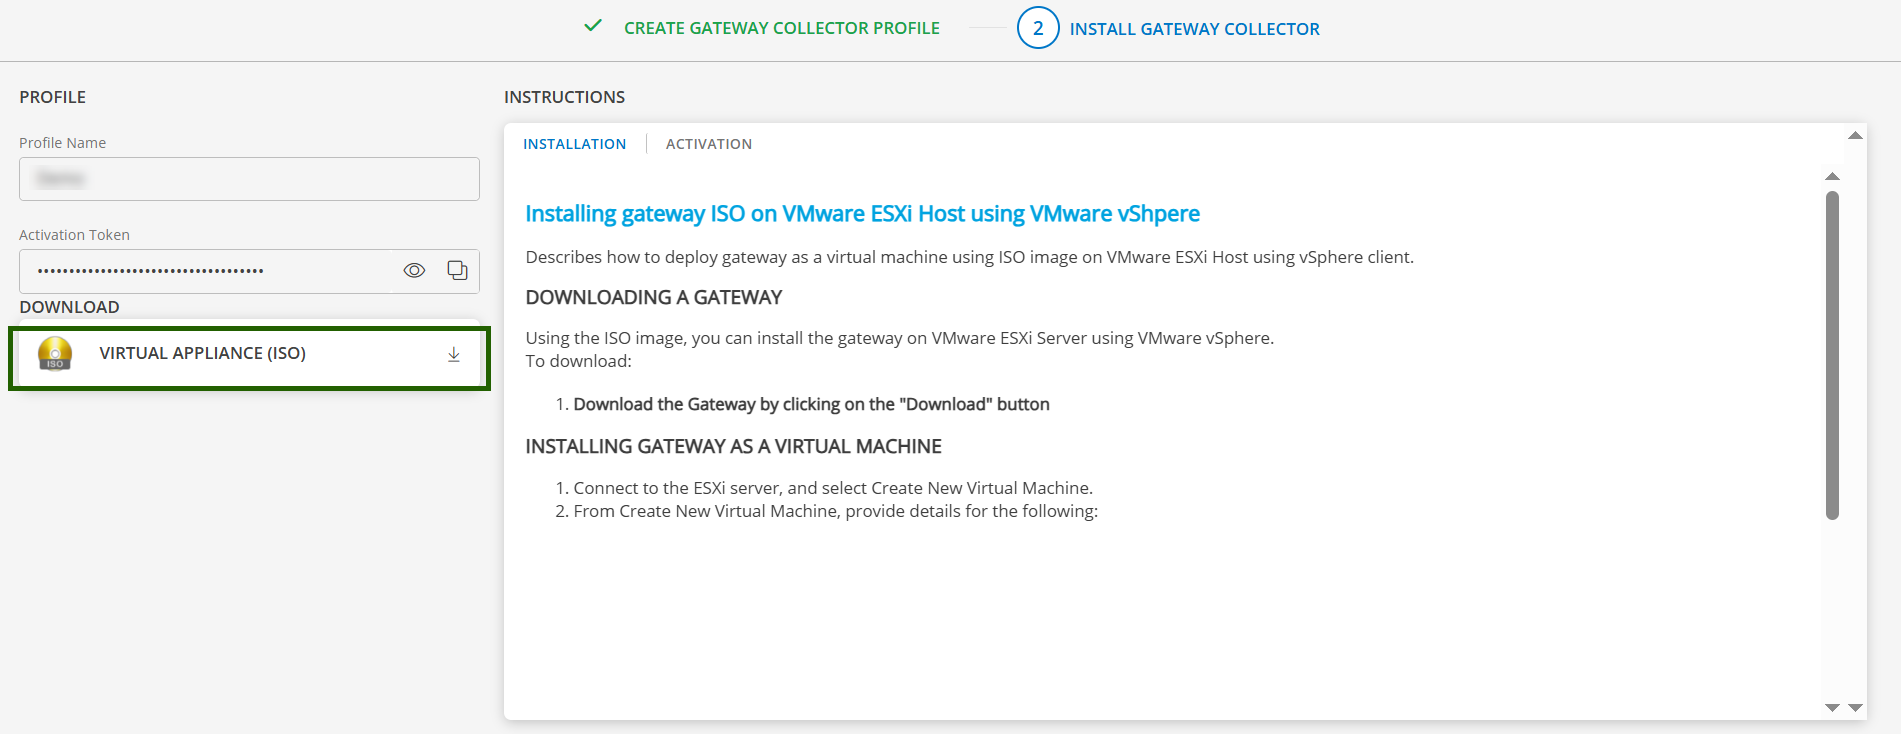
- Once the ISO is downloaded, you can proceed to the installation Step.
Step 2: Prepare the Gateway VM using ISO
Refer to the Prepare Gateway VM using ISO document for step-by-step instructions on deploying the Gateway as a virtual machine using the ISO image.
Step 3: Change Password
- Open the Gateway Admin UI at:
https://<Gateway IP>:5480. - From the Administration Menu, go to Password and change the password.
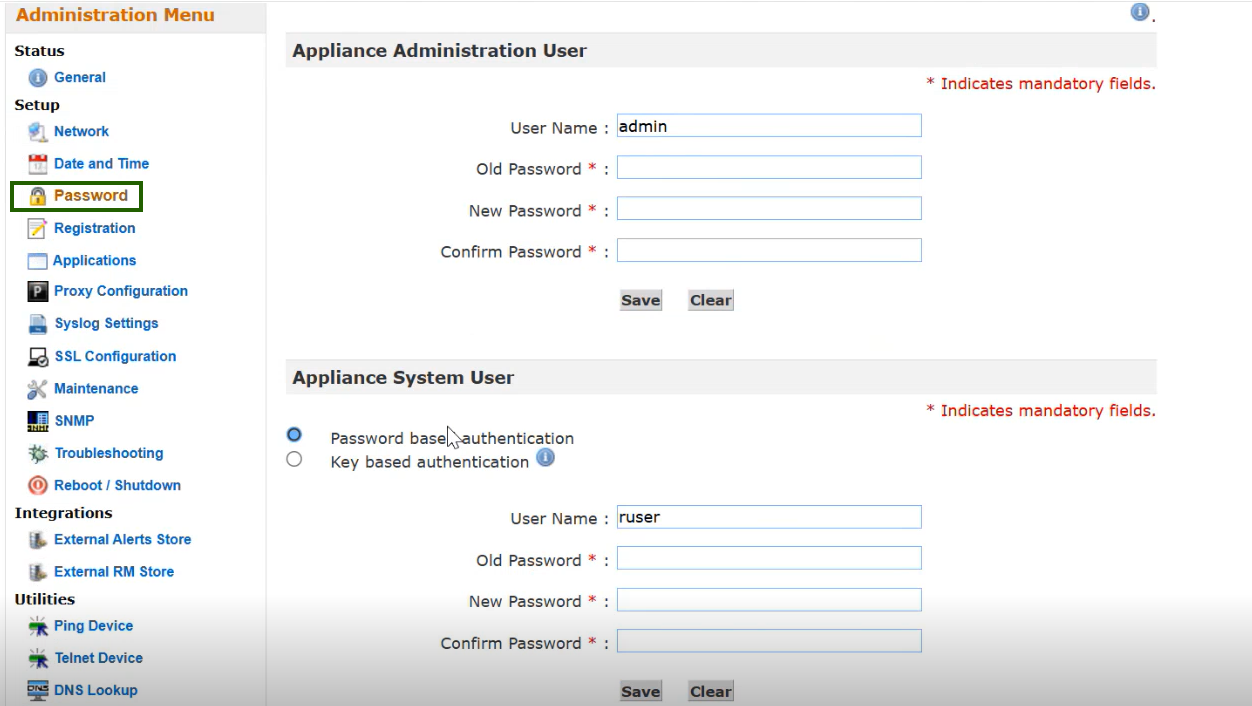
Note
- If you are accessing the Gateway Admin UI for the first time, you will be required to change the password immediately.
- For security best practices, it is strongly recommended to change the default system password right after provisioning the Gateway. This helps prevent unauthorized access.
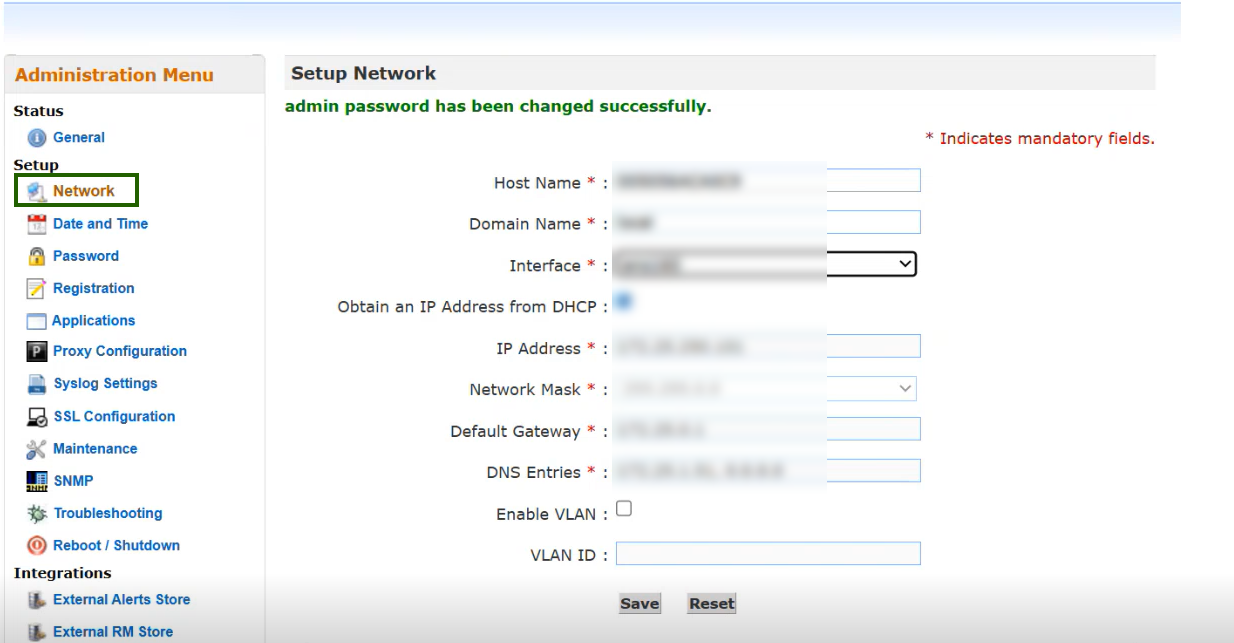
Step 4: Update Hostname and IP Address
- Open the Gateway Admin UI at:
https://<Gateway IP>:5480. - From the Administration Menu, go to Network and update the Hostname and IP Address.
Step 5: Register the Gateway
Refer to the Register the Gateway page for step-by-step instructions for completing the Gateway installation.